Saturday, July 11, 2009

Gardening for Butterflies

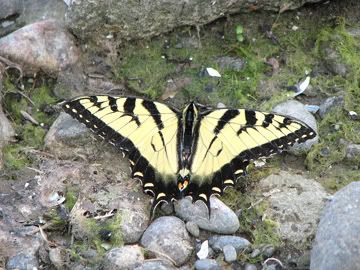
A butterfly garden can be as simple as a massed planting of butterfly-favorite plants in a sunny corner of your yard, or as large as a specially planted area of a state park.

Butterfly Garden Characteristics
• Sunny location
Butterflies depend on the sun to warm their body temperature to the 85°-100° F range needed for flying. Scientists have even observed that butterflies position themselves during the night so that the early morning sun touches their wings to warm them.
• Moisture
If you’ve ever wondered why butterflies congregate at the edge of a mudpuddle, it’s because they can’t drink directly from open water. You can recreate a similar setting by sinking a container of wet sand in the ground. Add rocks or sticks for the perches.
• Rocks
On cloudy or cool days large rocks provide a basking spot to help warm butterflies for flight.
• Nectar plants and host plants
Although the Roman naturalist Pliny the Elder thought caterpillars came from the morning dew that formed on tree leaves, we know that specific butterflies come from specific caterpillars.
Both the butterflies and the caterpillars need specific plants or flowers to satisfy their energy needs. Of course, the more varieties you can plant, the greater your chances for attracting more butterflies. Remember too, that planting in clumps — not rows — increases the likelihood of butterflies finding and choosing your garden for a feeding stop. The proper host plant for caterpillar feeding must be included to ultimately have the desired butterfly species.
• Shelter
Trees, shrubs, fences, and buildings can provide protection from prevailing winds. A leafy cover offers a hiding place from hungry birds.
• Untidiness
If you want to attract butterflies, it helps to be tolerant because butterflies prefer a “natural” look rather than a “tidy” garden. That means allowing some “weed” species, such as stinging nettle and thistle, to grow in the landscape. It also means avoiding pesticides. Insecticides are the most dangerous, but herbicides also can destroy needed nectar or host plants.
• Overwintering spots
We don’t see butterflies when the temperatures drop, but some of them do spend their winters in tree crevices, under bark, in log piles, or in building nooks. Hibernation boxes also are available. A log pile can serve as an over-wintering hotel for butterflies. The logs are criss-crossed to provide as many open spaces within the pile as possible. The ideal pile uses logs 3 to 6 feet long, stacked 3 to 5 feet high, and protected at the top by canvas or another covering. It should be placed in a sheltered location near nectar flowers or shrubs and host plants.

Favorite Nectar Plants
(Perennials)
Aster (Aster spp.)
Bee balm (Monarda didyma)
Black-eyed Susan or gloriosa daisy (Rudbeckia spp.)
Blazing star or gay-feather (Liatris scariosa)
Butterfly bush (Buddleia spp.)
Butterfly weed (Asclepias tuberosa)
Catmint (Nepeta x faassenii)
Chives (Allium schoenoprasum)
Coreopsis, lanceleaf (Coreopsis lanceolata)
Coreopsis, thread-leaf (Coreopsis verticillata )
Daylily (Hemerocallis spp.)
False indigo (Baptisia australis)
Fernleaf yarrow (Achillea filipendulina)
Gas plant (Dictamnus albus or D. fraxinella)
Globe thistle (Echinops ritro)
Goldenrod (Solidago hybrids)
Hollyhock (Alcea rosea), single varieties
Hyssop (Hyssopus officinalis)
Joe-pye weed (Eupatorium purpureum)
Lavender (Lavandula angustifolia ‘Hidcote Strain’)
Lilac, common or French hybrid (Syringa vulgaris)
Pearly everlasting (Anaphalis margaritacea)
Phlox (Phlox paniculata, Phlox maculata)
Purple coneflower (Echinacea purpurea)
Showy stonecrop sedum (Sedum spectabile
‘Autumn Joy’)
Snakeroot (Cimicifuga racemosa)
Sunflower heliopsis (Heliopsis helianthoides)

(Annuals)
Borage (Borago officinalis)
Cosmos ‘Sensation’ (Cosmos bipinnatus)
Dill (Anethum graveolens)
Globe amaranth (Gomphrena globosa)
Heliotrope (Heliotropium arborescens)
Lantana (Lantana camara)
Marigold (Tagetes spp.)
Mexican sunflower (Tithonia rotundifolia)
Nasturtium (Tropaeolum majus), especially
yellow varieties
Parsley (Petroselinum crispum) any variety
Pentas (Pentas lanceolata)
Stock (Matthiola incana ‘Annua’ hybrids)
Sweet alyssum (Lobularia maritima), especially
purple
Zinnia (Zinnia elegans)

Favorite Host Plants
Alyssum ,Nasturtium
Aster, Parsley
Borage ,Ragweed
Carrot ,Stinging nettle
Cherry, Thistle
Crabgrass ,Violets
Hollyhock ,White clover
Marigold, Wisteria

Authors: Richard Jauron, Linda Naeve & Linda Naeve

Wednesday, June 24, 2009

Garden Soil Management

Natural soils differ in an infinite variety of characteristics. There are thousands of individual kinds, each different from others in color, depth, size, and arrangement of the individual sand, silt, and clay particles, mineral composition, and content of organic matter. Most soils will grow
good vegetables, but a few may have special problems needing correction before planting. Some are too wet (poor internal water drainage), others are difficult to till (high clay content), and a few dry out too quickly (light sand).
Tillage
Unless there is serious danger of water or wind erosion, fall is the best time to plow or spade the garden soil. Fall tillage will help control certain insects and diseases that overwinter on the plant refuse. Fall prepared soils will be subjected to the early spring freezing and thawing action that will help improve the tilth and general soil aggregation. Also, the soils will dry out and warm up quicker in the spring. The soil should never be worked when too wet. If worked under wet conditions, the soil will become hard and restrict root growth, causing unproductive plants. If a handful of soil formed into a ball crumbles when pressed with the thumb, it is ready for plowing or spading. If the ball of soil retains its shape, delay soil tillage until the water content diminishes.

Organic Matter
A good garden soil should be high in organic matter. As crops are grown, the organic matter level of the soil becomes progressively lower unless organic materials are applied. Remember that commercial fertilizers are not a substitute for organic matter— both are needed for fertile, productive garden soil. The soil organic matter, or humus, is the dark brown to black substance in the surface layer of soil made up of organic compounds resulting from decomposition of vegetative and animal matter. Manure, compost, and other organic residues have several
advantages. They can:
• improve the soil physical condition or structure, thereby increasing the tilth or ease of working (this is especially true of soils that tend to pack badly or crust over);
• increase permeability to water;
• increase aeration, allowing increased oxygen supply to roots; and
• increase nitrogen and other nutrient retention, and aid soil microorganism population. The use of well-rotted animal manure provides a method of maintaining soil organic matter. Dry and pulverized manure also serves the purpose well and is usually more readily available in towns and cities as are processed sewage sludge, compost made from tree leaves, lawn clippings, garden refuse, and other organic residues. When other organic matter materials are not available, a fast growing, green manure crop may be grown and worked into the soil before the heading stage of growth.
Buying or hauling manures, waste hay, etc., from barns, feedlots, or fields may add some new kinds of weeds to your garden. Some commercially composted materials and processed manures available on the market are treated to kill weed seeds. Mixing undecayed, coarse plant materials, such as straw with manure, cornstalks, waste hay, straw, or cover crops, uniformly into the soil can be a problem to the gardener without power tools. Rotary cultivators and discs can do the job. Putting coarse material through a power grinder-shredder makes it much easier to work into the soil with hand tools, but grinder-shredders do not work well with wet, limp materials. Where a grinder-shredder is not available, a lawn mower can be used to cut up more tender materials such as cornstalks.

Animal Manures
Manures are a good source of humus and plant food if there is not too much litter (straw, sawdust, or shavings) mixed in, and if they have not been stored outside where heavy rains wash out the nutrients. Poultry or rabbit droppings taken from beneath roosts or hutches are high in nitrogen. They actually may burn plant roots if used too generously. The following table gives the percent of available nutrient content in undiluted animal and poultry excrement. The value of manure as plant food depends on the extent to which it has been diluted or leached by water and the proportion of bedding, such as straw, sawdust, or shavings, that is mixed in it. Apply barnyard manure at the rate of 500 to 1,000 pounds for each 1,000 square feet of garden area. This is equivalent to 10 to 20 tons per acre. Most manures are short on phosphorus in comparison to nitrogen and potassium, and it is desirable to plow or spade under some phosphate fertilizer at the same time.
Use 15 pounds of a 0-46-0 (superphosphate) fertilizer per ton of manure or use a high phosphate commercial fertilizer mix. Since poultry, rabbit, goat, and sheep manure are higher in nutrient content, cut back the rate of application to 200 to 400 pounds for each 1,000 square feet of area.

Green Manure Crops
Green manure crops are excellent soil builders and will supply satisfactory amounts of organic matter. Rye or wheat seeded at the rate of 3 to 4 pounds per 1,000 square feet, or annual ryegrass at 2 to 4 pounds may be used. Seed sown near the end of August will normally make sufficient growth before cold weather. If soil erosion is a problem, rye could serve as a winter cover crop and be turned under the following spring before heading.

Compost
Compost can be a good source of humus and a good way of getting rid of a lot of plant refuse from the yard or garden. It should be understood, however, that improper composting will not kill many weed seeds, disease organisms, or underground stems or roots of such plants as quackgrass, morning glory, iris, or bulbs. If you are having disease troubles with certain kinds of plants in your yard, keep those plants out of the compost. Be sure not to add garbage or other kitchen waste to the pile because rotting food attracts rodents.

Sewage Sludge
Two different types of sewage disposal systems are commonly used. These are (1) digested sludge by primary treatment with anaerobic digestion, and (2) systems activated by injection of air. Digested sludge is usually of relatively low quality as a fertilizer compared with products from an activated system. Dried, activated sludge, properly heat treated, normally commands a good price on fertilizer markets. Digested sludge, on the other hand, is often available without cost or at a low price. Activated sludges are widely used as fertilizers for lawns and golf courses. Heat treated sludges are normally safe for use from a sanitary standpoint. Digested sludge, not heat treated, should be used with some caution. Check with your local health department for specifics under which sludges that are not heat treated may be used as garden fertilizers. The plant food content of sewage sludge is variable. The following figures show the range within which most sludges will fall.

Sawdust and Mulches
Other materials also supply organic matter. Tree leaves are excellent, as are lawn clippings, peat, sawdust, straw, and spoiled hay and silage. Sawdust may be mixed with garden soil, whether fresh or weathered. Fresh sawdust will last longer than old sawdust when used as a mulch and will make soils somewhat lighter or more retentive of moisture when plowed under. Old or rotted sawdust will become humus more readily and is less likely to cause nitrogen deficiency. When mixing sawdust with soil, it is best not to work in more than 2 inches of sawdust per year. It should be mixed thoroughly with 6 inches of soil. A cubic yard of sawdust will cover 300 square feet 1 inch deep. A bushel will cover 15 square feet 1 inch deep. Whenever a sizable quantity of sawdust or other coarse fibrous material is added to soil, extra nitrogen must be applied with it. Most of the materials are high in carbohydrates (cellulose) and low in nitrogen. Soil microorganisms cannot get enough nitrogen from these materials to adequately break them down into humus, so they absorb additional nitrogen from soil reserves. In fact, so much soil nitrogen is “tied up” in bacterial action that garden plants next spring will be cut short and experience a nitrogen deficiency, evidenced by yellowing and stunting of growth. This is the most common problem facing users of organic mulches and sawdust. Some organic materials contain substantial amounts of plant food elements whereas others contain very little. Selection of a product high in nitrogen content will assist soil microorganisms in decomposition. of cow, hog, or steer manure, not containing bedding material) or a commercial fertilizer. Apply 10-10-10, 12-12-12, or other similar complete commercial fertilizer at the rate of 8 to 10 pounds per 1,000 square feet. Fall is the preferred time to plow or spade under organic matter. This allows partial decomposition of the material, and it is quickly available the following growing season. It is always wise to watch plant growth closely when large quantities of sawdust have been used. Slow growing plants with small, pale, green or yellowish leaves usually mean that the plants need more nitrogen. A side dressing later in the growing season may be necessary.

Soil pH
Soil pH, a measure of soil acidity, is important in maintaining a supply of calcium and minor elements. A soil pH of 7.0 is neutral, while a pH above 7.1 is alkaline or basic. Most Iowa soils are neutral or slightly alkaline. Most vegetables grow best on a slightly acid soil in the range of pH 6.0 to 6.8. Minor or trace elements, such as manganese and boron, are not likely to be a problem if the pH is within this range. The growth appearance of your crop is the best guide to adequate pH levels. If a few or all of your vegetable crops are not growing well or if your garden space is on new ground, then a pH test may be necessary. If a pH test indicates a low soil pH, liming is necessary. Only a small percentage of Iowa soils require liming. It is unwise to assume that lime is needed since overliming can cause damage. The only way to determine the lime requirement is by soil analysis. When a soil test indicates lime is needed, the material can be applied either in the fall or in the spring. The soil test will indicate the necessary amount to apply per 1,000 square feet. It is important to apply lime before plowing or deep disking since it should be mixed with the soil to be most effective. If ground limestone can be obtained, it should be applied in preference to hydrated lime. Ground limestone will be available over a longer period and usually costs less than hydrated lime.

Commercial Fertilizer
Commercial fertilizers are effective and economical for supplying some of the mineral elements used by plants. Home vegetable gardens are not usually large. For a few dollars, enough fertilizer can be applied to bring soil nutrient level up for vigorous crop growth. But it must be remembered that it is possible to apply too much fertilizer, which can be just as undesirable as too little. There are many kinds and grades of fertilizer that can be used on gardens. By law, all commercial fertilizers, including specialty fertilizers (such as organics) must state the guaranteed analysis on the bag; that is, the percentage of nitrogen (N), phosphorus (as P2O5), and potassium (as K2O)—always in that order. For example, a 6-10-4 fertilizer contains 6 percent available nitrogen, 10 percent available phosphoric acid, and 4 percent available potash. Other analyses might be 10-10-10, 12-12-12, or 5-10-10, to mention only a few. As a rule, those with the higher numbers are more economical to use since the cost per unit of actual nutrient is lower. Several other elements are necessary for plant growth. These are called the minor or trace elements. Iron, boron, manganese, and zinc, as well as others, are in this class. Most soils contain sufficient amounts of the trace elements, and it is only in rare instances that separate applications of these materials are needed. Many of the commonly used commercial fertilizers contain the trace elements as impurities. Animal manures also contain a number of trace elements.

Soil Tests
Soil tests carried out by Iowa State University’s Soil Testing Laboratory are available to gardeners as well as commercial growers. Your County Extension Office has shipping boxes, directions for taking samples, and information sheets that should be sent in with the samples. The general soil test includes determinants for soil acidity or soil pH, phosphorus, and potassium. Special tests for organic matter, zinc, and sulfur also are available. There is a small fee for the test and mailing. Soil in yards is often shifted around as lots are leveled or graded, basements are dug, and driveways and walks are put in. If you take a sample for a soil test, be sure it represents an area that is fairly uniform in color and texture. If there is noticeable difference in parts of your yard, or the part you want tested, separate samples may be worthwhile. After the test is completed, you will receive recommendations for fertilizer application.

How Much Fertilizer to Use
The rate of fertilizer to apply will vary depending on past fertilizer use, crops grown, soil type, and other factors. However, it is usually safe to apply a low analysis fertilizer, such as 5-10-5 or 6-10-4, annually at the rate of 20 to 30 pounds to each 1,000 square feet. Fertilizers of higher analysis, such as 6-24-24, 12-24-12, or 12-12-12, may be applied at half the above rate. If scales are not available the material can be measured. One pint weighs approximately 1 pound. If manure has been used at the rate of 500 pounds or more per 1,000 square feet, reduce the rates by one-half.
Caution: If there are large quantities of straw, sawdust, or shavings mixed in with the manure, the growth promoting effects of the manure nitrogen may be reduced. Extra nitrogen may be needed in the general fertilizer program or as a side dressing during the growing season. Weak growth and pale green leaves are often evidence of too little nitrogen available to the plants. If the plants need extra nitrogen, use about 2 to 3 pounds of actual nitrogen per 1,000 square feet of garden area. The most efficient method of application is by side dressing. Apply the lower amount to closely spaced rows, such as carrots, beets, lettuce, etc. Use the larger amount for wider spaced rows, such as tomatoes, corn, potatoes, etc. To apply the side dressing, spread the fertilizer evenly along the row in a 3- to 4-inch wide band. Rake it in below the soil surface or irrigate with an inch or more of water. Many garden crops respond to additional fertilizer applications later on in the season.
Cucumber, squash, broccoli, cabbage, and others can be fertilized by side dressed applications a month or 6 weeks after planting. About 2 tablespoons of a complete fertilizer around each plant should be enough. Tomato yields may be increased by side dressing, but the fertilizer should not be applied until the first cluster of fruit has set. Overfertilization of any garden crop may cause the plant to make excessive vegetative growth at the expense of fruit set.

Liquid Starter Fertilizers
Fertilizer in liquid form is often used at transplanting time. Completely soluble, high analysis materials are available for this purpose. Such fertilizers should not be applied in dry form but should be dissolved in water before application. Follow the directions on the container when using these materials. Complete fertilizers may also be used for the liquid starter application. Use low analysis materials at 2 tablespoons per gallon of water or high analysis at 1 tablespoon per gallon. Liquid starter fertilizers are used at the time plants are being transplanted to the garden. After planting, apply 1⁄2 to 1 pint around each plant.

Authors: by Henry G. Taber and Linda Naeve

Wednesday, June 17, 2009

Composting and Peat-free gardening

Compost is made up of decayed plant material and can be used in a variety of ways in gardening and horticulture. This leaflet gives advice on the different types of compost, where and how to use it, and how to make your own. At present, peat is heavily used in domestic and commercial horticulture. However peat comes from a declining resource and its extraction causes damage to rare habitats in the UK and abroad.

Soil improvers are added to the soil to improve texture and structure. Adding garden compost or leaf mould will help enrich your soil.

Mulch is a layer of material placed on top of the soil to keep down weeds, conserve moisture or insulate the soil.

Growing medium is what you grow your plants in. If your existing garden soil is not suitable for your needs, you may want to use specialist products such as potting mixes or seed compost.

Garden compost is made from recycled kitchen and garden waste. It is best used as a soil improver to feed and condition soil. Apply in the spring and summer, either dig into the top 15-20cms of soil or apply as a surface mulch. You can also top up tubs and planters with a layer of compost. Best of all use compost in vegetable beds particularly for potatoes, tomatoes brassicas and other leafy crops. A compost mulch applied every three years is enough for most shrubs and herbaceous perennials but you will not need it for annual flowers. Use as a mulch for fruit crops every three to five years depending on the type of fruit. Use for herbs such as chives, parsley and mint, which need a good supply of food and water. If you want to use garden compost for raising seeds or potting plants you will need to dilute it by adding other ingredients to make a growing medium (for example two parts compost, one part loam/good soil and one part leaf mould or coir).
Green Waste Compost Lots of councils are now recycling local garden and commercial waste to make peat free compost which they use in local parks and gardens. They often sell it to the public for use in their own gardens and allotments. The Government is trying to reduce waste produce sent to landfill sites and increase the amount of recycling. Green waste compost helps deliver against these Government targets as well as producing a useful by-product. Check what they sell to see what it can best be used for.
Multi-purpose compost is what you commonly see for sale in garden centres. It is often a mixture of materials used for raising seedlings and growing plants in pots (ie as a growing medium). Many of us, often unknowingly, buy peat-based composts. Products are not always clearly labelled for their content. There are many good peat-free products on the market. Always ask if the compost you have picked is peat free and encourage garden centres to label products clearly. Leaf mould is made up of old rotted leaves and is great as a soil improver, lawn conditioner or mulch.

What is peat?
Peat forms in waterlogged conditions where a lack of oxygen prevents dead plants from decaying fully. Each year new plants such as sphagnum mosses, bog cotton and heathers grow and die, and layers of plant material gradually accumulate over hundreds and thousands of years to form peat. Peat bogs form some of England’s most scarce habitat and provide a unique home for a wealth of plants, animals and insects. They also provide an important feeding and stopping-off point for native and migrating birds. Because peat bogs can be thousands of years old (and pre-date our Stone Age ancestors!) they contain layers of historical data. By examining a section of peat, scientists can tell what our landscape was like, what type of animals colonised the area, and what weather conditions prevailed. Peat has been very popular in gardening as a growing medium. Some people also use it as a soil improver or mulch but there are much more suitable products for these purposes such as well rotted manure and garden compost as soil improvers and wood chip as a mulch. At present 66% of all peat harvested in the UK is used by domestic gardeners. Increasingly peat is being imported from other countries such as Ireland and the Baltic. If we continue to destroy these peat habitats we will ruin a vital part of our natural heritage, lose dozens of rare plants, animals and insects and miss out on the chance to look into the past. We don’t need to keep destroying our own and others’ wildlife. There are lots of peat-free products on the market and the quality has improvedmarkedly in recent years. Specialist products have been developed for raising seedlings etc. What can you do to protect wildlife sites in England and other countries?

Making your own compost
Do I have to be an expert to make my own compost?
No. Composting just happens - it is nature’s way of keeping our planet clean. Making compost can be as easy as putting a few weeds and vegetable scraps onto a compost heap - or you can put a lot of effort into it. It’s up to you. One method is outlined opposite.

What can I compost? If it can rot, it will compost. Some things, like grass mowings and soft young weeds, rot quickly. They work as ‘activators’ or ‘hotter rotters’, getting the composting started, but on their own will decay to a smelly mess. Older and tougher plant
material is slower to rot but gives body to the finished compost - and usually makes up the bulk of a compost heap. Woody items decay very slowly; they are best chopped or shredded first, where appropriate. For best results, use a mixture of types of ingredient. Avoid using meat and fish, newspaper, coal and coke ash, dog or cat litter, disposable nappies or glossy magazines. When the ingredients you have put in your container have turned into a dark brown, earthy smelling material, the composting process is complete. It is then best left for a month or two to ‘mature’ before it is used. Don’t worry if your compost is not fine and crumbly. Even if it is lumpy, sticky or stringy, with bits of twig and eggshell still obvious, it is quite usable. The method shown opposite will take a year or more. If you are able to put in more effort, you can make it quicker. Check out the internet for more information. Making your own leaf mould Leaf mould is a humus-rich substance which will add bulk and organic matter to the soil, improving its structure. It also makes a good seed compost and can be mixed in with potting compost. It is slower to make than ordinary garden compost but a good use of all those autumn leaves. Just pile them up in a wire mesh enclosure or in bags with holes punched in the sides. Deciduous leaves are best, but if you want acid compost for acid loving plants, evergreens can be used. If it is dry when you collect them add a bit of water to get things going. A year on will provide you with well rotted leaves but you can leave them longer. Use on your vegetable patch for winter cover, as a mulch on container plants in the autumn or as a mulch for the fruit garden. Year-old leaf-mould can be sieved to give a fine compost to add to potting composts.

Choosing a compost bin
There are lots of different types of compost bin on the market. You do not need a fancy or expensive container. Compost can be made using a simple heap on the ground covered with plastic or old carpet to keep it moist. If you want to make your own bin, an easy option is an old dustbin with the bottom cut out. You can also make a simple bin by driving four posts into the ground and stapling wire around them, leaving one side easy to open for access. Line with cardboard and top with a square of carpet or a plastic sack. Another type of sturdy bin can be made by building three sides from breeze blocks with a wooden removable front. There are a wide range of recycled plastic bins on the market. Choose one which will suit your garden. Things to bear in mind are:
how sturdy is it? It will have to be able to withstand battering with forks and spades as you fill and empty it. The top opening should be large enough to take a fork full of green waste comfortably, so remember to make sure its not too high for you to use. Also check it is not too heavy if you want to be able to lift the container off the compost to get it out to use. A minimum recommended volume is 700 litres (0.7 cubic metres or one cubic yard). Pick one you feel you can fill from your waste. Whatever you choose, make sure you have easy access and space around to use the compost heap. Its best to site it straight on the ground as opposed to a concrete or hard surface, allowing for drainage and worm access.

Author: www.english-nature.org.uk

Thursday, June 11, 2009

Tips For Successful Backyard Grape Growing

Growing grapes in the backyard or garden can be a rewarding experience. It can also be quite a failure if not done properly. Grapevines are perennial plants and will grow for years to come. There are a few things to consider before you just jump in and start planting your grapevines. Otherwise, mistakes made at planting will haunt you in the future.

Grapes need lots of sunshine. One of the biggest mistakes that the home gardener makes when growing grapes is to plant them in the shade under a tree or where they get shaded by houses most of the day. If you watch wild grapevines grow, you will notice they make all efforts to climb trees and shrubs to get into the daylight. Without proper sunlight, proper ripeness cannot be obtained. Be sure the spot you choose has good sun most of the day.

A second mistake that many home gardeners make is to not take into account the grape variety's growth habit and vigor. These two factors come into play when planting the grapevine and deciding on how to trellis the vine.

Vigorous varieties need lots of space. You can find out how vigorous a variety is by consulting your local nursery where you bought your vines. Vigorous varieties need eight feet between vines when planting. Less vigorous varieties can be planted closer at six feet between vines. Very low vigor vines can be planted as close as four feet.

Growth habit determines the trellis type and how the grapevine will be trained and pruned. Grape varieties with a large portion of their ancestry coming from wild American species tend to droop. These are like the wild vines that grow to the top of small trees and shrubs then cascade downward during the summer. The gardener will find that it is best to mimic this natural growth.

Vines of this type will be trained to a high wire about six feet off the ground. The grapevines are pruned to two to four long canes each year. As the shoots grow each year from the canes left at pruning time, they will grow outward from each side and soon start drooping towards the ground, forming a curtain of leaves by the end of the growing season.

Many varieties have the European grape, V.vinifera, in their ancestry. The European grape varieties tend to have a more upright growth. These grape varieties need a more extensive trellis system. At least four wires are needed to contain them. The first wire is approximately three feet off the ground with the two additional wires at eight inch intervals above the bottom wire. The vines are trained to a trunk that extends to the bottom wire.

Two to four canes are pruned and tied to the bottom wire on each side of the trunk. As the shoots grow during the spring and summer they are tied straight up to the wires above. Once the shoots have reached approximately 16 inches above the top wire, they are cut off at the tips. This "hedging" prevents further growth and shading of the vine below.

Grapes need a good water supply when they are actively growing in the spring and summer. They should be watered at least once a week in areas of little rain. More often under droughty conditions. This watering shoud be continued until the berries begin to turn color. After coloring, watering is not needed and will in fact slow the ripening process. Once the leaves have fallen in the fall, one last large watering should be undertaken before the ground freezes to get the vines through the winter.

Perhaps the biggest mistake I see with home gardeners growing grapes is neglecting pruning the vines each year. This is a must! Without pruning the grapevine becomes an overgrown tangled mess. The grapevines overbear and the berries don't ripen properly. Disease sets in as the vine is over shaded and doesn't recieve drying winds. The vines will weaken over time and eventually die before their time.

Pruning removes 90-95% of the previous year's growth. It keeps the vines in balance and aids in controlling the crop and ripening the fruit. Pruning the grapevine is an art, not a science.

Author: ContentMart Editor


Tuesday, June 9, 2009

Super Strawberries

Because they bear early and are relatively easy to grow, strawberries are a great crop for you to start with in your home fruit planting. Strawberries are the most widely grown fruit crop in the world. They can flourish from tropical highlands to subarctic regions. The plants are hardy throughout NewYork State (if managed and mulched correctly) and can tolerate a wide range of soil types. Strawberries provide more vitamin C than oranges and have fewer calories than most other fruits. Day-neutral cultivars, which bear fruit from June through October in the Northeast, are now available.The section below discusses traditional “June-bearing” cultivars that fruit in June and July.

Choosing Cultivars
You can find June-bearing cultivars adapted to northern climates in many nursery catalogs. Some cultivars perform better than others, but it is difficult to predict which will grow best in a particular garden. Cultivars differ in flavor, disease resistance, cold tolerance, when they ripen, and suitability for frozen storage. Perhaps the best way to decide which cultivars to grow is to find out what works well for your neighbors or local commercial growers. Then try several promising cultivars before planting a large area. June-bearing strawberry cultivars are reliably winter hardy throughout New York (as cold as USDA Hardiness Zone 3), provided they are properly managed and mulched. Some cultivars that perform well include:
• Earliglow—perhaps the best-flavored cultivar, it is among the earliest to ripen.
• Northeaster—ripens about the same time as Earliglow. It is resistant to red stele and does well on heavier clay soils. The berries are large and have a hint of grape flavor, which some people love and others dislike.
• Sable—has excellent flavor and also ripens early.
• Allstar—a reliable producer with large light red to orange, sweetflavored berries.
• Honeoye, Cavendish, Kent, Raritan, Redchief, and Scott—good midseason strawberries.
Choose a site with full sun, good drainage, and a pH between 5.5 and 7.0. Begin improving
the soil the year before planting, especially if the pH needs adjusting. Plant in early spring in soil where no strawberries, brambles, or crops in the tomato family (including potatoes, peppers, and eggplants) have been grown for several years. Strawberries are shallow rooted. Keep plants well watered, especially just after planting. Do a good job of early weed control during the establishment year to prevent problems later. If using the matted-row system, pluck flowers the first year to encourage runners to fill out a 12- to 15-inch-wide strip, but don’t let plants get too crowded.
• Jewel—the most widely grown variety in the Northeast, it has excel- Keys for Success
lent flavor. It is productive and maintains a large fruit size throughout
the season.
• Lateglow—a reliable late-season cultivar.
All these cultivars are cold hardy, yield well, and produce firm fruit with good freezing quality. Allstar, Cavendish, and Jewel produce exceptionally large fruits.

Buying Plants
Purchase dormant, virus-indexed plants from a reliable nursery. Nurseries usually sell plants in bundles of 25. Ask that they be shipped in late April or early May. When plants arrive, check them for signs of winter injury, mold, and root rot. Plants showing signs of winter injury—a brown- or orange-colored internal crown—are likely to die if the weather quickly turns hot and dry after planting. A heavy mold on roots and crowns indicates that they weren’t stored properly. If plants are moldy, discard them. Store healthy plants in a refrigerator until you are ready to plant.

Site Selection
Strawberries grow best in a sunny location with deep, well-drained sandy loam soil with a pH of approximately 6.2. The plants do not tolerate extremes in pH, either below 5.5 or above 7.0. Determine pH by testing the soil, and follow recommendations to adjust the pH accordingly a year before planting. Lime and other soil amendments that are used to adjust pH require at least two months of warm weather to work, so don’t wait until the fall before planting to apply them. Plants can be productive over a broad range of soil types, but avoid extremes. Heavy clay soils retain moisture but are often poorly drained, while sandy soils drain well but require irrigation. Add organic matter to sandy or clay soils to reduce those shortcomings. Adequate drainage is essential for healthy strawberries. If your site is poorly drained, plant on ridges or in raised beds. Strawberry plants are shallow rooted and benefit from irrigation. Consider using irrigation to prevent yield reductions caused by drought, particularly on raised beds, which can dry out quickly. Drip irrigation works well for home gardens. Do not plant strawberries in an area where they were recently grown. Also avoid planting them where crops in the tomato family (Solanaceae, including eggplants, potatoes, and peppers) have been grown. Before planting, find out about the soil and its history. It may harbor troublesome pests, particularly perennial weeds or weed seeds, insects, soilborne diseases, or nematodes. Control insects that reduce strawberry yields, such as white grubs, strawberry root weevils, and European chafers, by growing a crop other than strawberries for a year before planting. In soils where the fungi causing red stele and verticillium wilt are known to be present, plant only resistant cultivars. Northeaster, Allstar, Cavendish, Redchief, Scott, and Lateglow are resistant to both red stele and verticillium wilt. Honeoye, Kent, Raritan, and Jewel are susceptible to these two diseases.

Growing Methods
There are several different systems that you can use to grow strawberries. You should decide which is best for you before ordering plants. The matted-row system is the easiest to maintain. Set plants 12 to 24 inches apart in rows that are 48 inches apart. Pluck off the flowers the first season to encourage vegetative growth. The plants will produce side stems with daughter plants called runners. Ideally, you want about six to eight runners per plant. Your goal is for the runners to fill out a strip about 12 to 15 inches wide (18 inches at the most). If you set the plants closer than 12 inches at planting, you’ll have too many runners and the planting will be too crowded. You’ll have to either spend more time thinning the plants or settle for lower yields from the overcrowded plants and possibly more risk of disease. Harvest fruit from these 12- to 15-inch-wide rows in subsequent years. The planting will be most productive on the edges. Rows any wider are harder to weed and harvest, and the plants are at greater risk of disease. Use a rototiller or hoe to remove plants that stray into the area between the rows. Within the rows, you want to keep the soil covered with plants, but you don’t want them to be too crowded—no less than about 6 inches apart. Clip off runners to keep the plants from getting too crowded. Clipping runners is hard work, but it increases fruit size, decreases rotting, and makes
harvest easier. With most plantings, you can expect about three years of harvests before the stand declines seriously. As the planting ages, weeds will become more difficult to control, and diseases often become more of a problem. At some point, you’ll want to start over at a new location. You may be tempted to use runners from your existing planting. But it’s usually best to purchase new, disease-free planting stock. Otherwise, you will just move any disease problems right into your new planting. Keep topsoil covered with plants, but avoid overcrowding. The ribbon-row system is more labor intensive and requires purchasing more plants, but it produces fruit the first year. Space the plants just 4 inches apart in rows 36 inches apart. Do not remove flowers, and clip all runners. Plants managed this way are very productive and produce large berries. Continue harvesting berries for about three years or until productivity declines.

Planting and Early Care
No matter which planting system you use, plant strawberries as soon as possible in the spring (fall planting is not recommended in the Northeast). Prepare soil the season before planting to speed soil warming and minimize the need to work the ground before planting. If the soil is still frozen when your plants arrive, refrigerate them until the ground has thawed. Avoid exposing the plants to sun and wind. Cool, cloudy weather is ideal for planting. Dig a hole large enough so that the roots can extend vertically, then cover the plants with soil to just below the crown. Do
not bury the crowns. You may need to cut the roots back to 4 inches before planting to avoid J-shaped root systems. Several weeks after planting, the plants will begin to flower from buds formed within the crown the preceding fall. If you are using the matted-row system, remove these flowers to prevent fruiting and encourage runners. Berries on first-year plants rob the plants of energy necessary for growth, runner production, and winter survival. Although some strawberry cultivars produce only one flower cluster per plant, others produce several sets, so you may need to check the planting and remove flowers several times. About six weeks after planting, apply 2 pounds of 10-10-10 fertilizer per 100 linear feet of row. Apply another 2 pounds in early September before flower buds form. Sprinkle the fertilizer evenly over the row area, and try to avoid contact with the foliage. Don’t work the fertilizer into the soil, or you may damage the shallow roots.

Managing Your Planting
Watering. Because of their shallow root systems, keeping strawberries well watered is extremely important. There is a tendency to overfertilize strawberries when actually a lack of water is holding back yields. Strawberry plants need about 1 inch of water each week, either by rainfall or irrigation. Avoid watering in the very early morning or late evening so the plants are not wet for long periods. When overnight frost threatens blooming plants, cover them with row covers or use sprinklers to deliver a fine mist over the planting. Ice that forms on the plants actually prevents the flowers from freezing. Apply the mist continually from the time the temperature falls below 34 degrees F until the ice melts in the morning.
Weed control.
Remove weeds by cultivation, hand hoeing, or pulling. The most important time to keep the strawberry planting weed-free is the first few months after planting while the plants are sending out runners and new plants are getting established. Do a good job of soil preparation and weeding early and you will have fewer weed problems later. Few herbicide options are available to home gardeners.
Mulching.
In the fall cover your strawberry plants with mulch to prevent injury from low temperatures. Mulching is particularly important on clay soils or those that remain wet for much of the year. Clean straw is traditionally the mulch of choice (avoid mulches that might contain weed seeds, such as hay). Apply mulch when nighttime temperatures approach 20 degrees F, covering the plants 2 inches deep. Remove the mulch in early spring—around the end of March to mid-April, after the threat of severely cold weather has passed. Strawberries are evergreen. The plants that have overwintered will have green leaves, and they will begin photosynthesizing when you remove the mulch and expose them to the sun. Place the mulch between the rows to help smother weeds and to keep mud from splashing onto the fruit. If you remove mulch early, you can cover plants with a floating row cover to provide additional protection and encourage early growth. Plants will flower and set fruit earlier. But use caution in areas prone to late spring frosts that could kill the flower buds. (If you lose the first flowers to frost, fruits from later flowers usually compensate.) Remove row covers before flowers appear so that insects can pollinate them. This also reduces the chance of Botrytis fungus causing fruit rot.In the Northeast strawberries typically flower in May and produce fruit inearly June through early July (depending on the cultivar and weather). Watch the flowers for signs of insect damage, particularly by tarnished plant bugs. Fruits ripen about 30 days after the flowers open. Renovation and fertilization. Renovate your strawberries immediately after harvesting to help reduce disease, stimulate vigorous new growth, and prolong the life of your planting. Mow or clip the plants to a height of 3 inches. If you can, collect your clippings in the mower bag or rake them off and remove them to the compost pile to help reduce disease. Rototill the area between the rows to incorporate the mulch. While you are tilling, reduce the width of matted rows to about 12 inches. Rake or hoe soil from the alleyways to cover the plants left in the row to about 1 inch deep. While renovating, fertilize at a rate of 5 pounds of 10-10-10 fertilizer per 100 feet of row. Never fertilize with nitrogen before harvest because this increases fruit mold. (The one exception is fertilizing at planting, but you remove flowers during the planting season when you use the matted-row system so there is no harvest that year.) For more efficient fertilizer use, apply about twothirds of that rate at renovation and one-third in September.

Diseases and Pests
Many insects feed on unripened fruit and young vegetative growth, and several diseases render the berries inedible or attack the roots. Whenever possible, select disease-resistant cultivars and virus-free plants. For assistance in diagnosing problems with strawberries and other berry crops.
Botrytis fruit rot (gray mold). This disease is the most common and serious fungal disease of strawberry plants. It affects the flower petals, flower stalks, fruit caps, and fruit, and it is most prevalent during prolonged rainy and cloudy periods just before or during harvest. Blossoms are very susceptible and often turn brown and dry into their stems. Blossom infection leads to fruit infection, which begins as soft, light-brown areas that enlarge rapidly. In later stages, a gray dust of spores covers the fruit as it shrivels and mummifies. Handling diseased fruit while picking spreads the fungus to healthy berries. Under conditions favorable for disease development, healthy-looking fruit can rot within two days of picking. To prevent botrytis fruit rot, practice good weed control and provide adequate nutrition. In particular, be sure that calcium and potassium are sufficient, and do not overfertilize with nitrogen. Fungicides are most effective when used during bloom.
Verticillium wilt. This fungal disease infects about 300 different host plants, including fruits, vegetables, woody ornamentals, flowers, and weeds. Once established in the soil, it infects plantings for many years. In new strawberry plantings, the first symptoms often appear about the time runners form. With older plants, symptoms appear just before the berries ripen. Symptoms differ with cultivar susceptibility. Generally, the outer older leaves turn reddish or dark brown at the margins and between the veins. Then they wiltand drop. Few new leaves develop, and those that do emerge are stunted, wilted, and curled up along the midvein. Severe infections produce stunted and flattened plants with small yellowish leaves. Many plants wilt and die rapidly. With less severe cases, occasional or scattered plants wilt and die. To minimize verticillium wilt, always start with healthy plants, and do not plant them in low-lying wet areas. Always clean garden tools before use, particularly if they are borrowed, to prevent the spread of infection. Avoid planting susceptible cultivars where other plants commonly infected by verticillium wilt (tomatoes, potatoes, eggplants, peppers, brambles, or other strawberries) have been grown in the past several years.
Red stele. This fungal disease is commonly found in low-lying, poorly drained areas of a strawberry planting. It can spread and become well distributed over an entire patch, especially during cool, wet springs. Infected plants are stunted, lose their shiny luster, and fail to send out runners. With the first hot, dry weather of the season, diseased plants quickly wilt and die. To identify the disease, dig up the plants and look at their roots. Infected plants show few new roots compared with healthy plants, whose roots are thick and bushy. Peel away the outer portion of the white roots and the central part (stele) appears pink to red or brownish red. Normally, the stele is yellowish white. The best way to control red stele is to plant only resistant cultivars. Whenever possible, choose a well-drained site that has no history of red stele, and avoid planting in low-lying areas.
Leather rot. This disease infects primarily fruit at any stage of development, but it also can infect blossoms. It is common in poorly drained areas or where berries are in direct contact with the soil. Leather rot first appears as a darkened spot on the berry, but as the infection spreads, the entire berry becomes brown, leathery, and rough. Infected berries have a distinctively unpleasant smell and taste. To confirm the presence of leather rot, cut through several berries and look for a marked darkening. Unfortunately, mild infections that go unnoticed can ruin a batch of jam or jelly. To help prevent leather rot, mulch early in the season to prevent the fruit from contacting the soil and avoid planting in wet sites.
Leaf diseases. Leaf spot and leaf scorch generally appear in early to midspring. Severe infections cause premature death of the leaves and reduce fruit quality. The most obvious symptoms of leaf spot are small round purple spots on the upper surface of the leaf. Leaf scorch is characterized by round to angular dark purple spots that enlarge to resemble small drops of tar. Strawberry leaf diseases are most prevalent on old weak plants. To minimize their occurrence, remove old and infected leaves from runner plants. Choose a site with full sun, well-drained soil, and good air circulation. Control weeds and fertilize to keep the plants in good condition. Tarnished plant bugs. The brownish adults are about 1/4 inch long and marked with yellowish and black spots. The nymphs suck plant juices and inject toxic substances that kill the surrounding tissues in the bud. Injured berries remain small, have a woody texture, and fail to mature. “Button berry,” or seediness around the tip of the fruit, is a serious problem that occurs when the bug punctures young fruits before they fully develop. Tarnished plant bugs are more troublesome in fields bordered by woods and fencerows, where weeds are plentiful. They appear in the strawberry patch when plants start to bloom. To confirm their presence, hold a shallow white dish under the leaves and blossoms of a strawberry plant and tap the flower clusters over the dish. If several small green nymphs fall into the dish, consider using an insecticide to prevent the formation of nubby, inedible berries.
Strawberry bud weevil. This insect typically cuts buds and partially severs stems, resulting in the loss of blossoms. Injury is most likely to occur in strawberry patches near woodlots or other protected sites where the weevils overwinter. The dark reddish brown weevils leave these hiding places in the spring when temperatures approach 60 degrees F and infest plants having early fruit buds. Injury is often noticed before bloom and during blossoming. Late cultivars usually suffer the most damage. Spittlebugs. Named for the mass of frothy material that covers their bodies, nymphs of this insect appear in April or May and complete development in five to eight weeks. The adults have sharp beaks that they use to pierce the stems of plants and suck their juices. Spittlebugs also attack flower bud clusters, leaf stems, and new crown growth. Although heavy feeding by spittlebugs can stunt berry and plant growth, the problems are generally cosmetic. Infestations are usually not severe enough to warrant the use of an insecticide.
Spider mites. These pests often go unnoticed because of their small size, but their damage is easy to see. As spider mites feed and deposit eggs on the undersides of leaves, plants lose their healthy green luster and become a coppery bronze color. Severe infestations weaken strawberry plants and interfere with sugar production and other normal processes. Mite life cycles vary with the season and weather. They can reproduce continuously from early spring until late fall. In general, hot, dry weather (particularly in July and August) and high nitrogen fertilizer rates favor rapid population increases. Insecticides are not effective because technically the mite is not an insect. Avoid overfertilization and keep the plants watered. Natural enemies often keep mites in check.
Slugs. Few creatures evoke as much frustration for gardeners as the common slug. These mollusks (related to snails and shellfish) come in all sizes and leave slimy trails. As they feed at night or on dark, overcast days, they make small, moderately deep holes in ripening berries. Slugs overwinter in protected places beneath mulch. Various homemade traps, such as shallow pans of beer placed at ground level, and handpicking can reduce populations. Several control products and baits are available.

Day-Neutral Strawberries
Unlike the common June-bearing strawberries discussed above, day-neutral strawberries flower and produce fruit anytime temperatures are between 35 and 85 degrees F. Instead of a bumper crop in June and July, harvest is spread out through the summer to as late as October, and plants yield well during the planting year. Because they do not send out runners as profusely as June bearers, you need to manage them differently.
Cultivar selection.
The most successful day-neutral cultivars for the Northeast are Tribute, Tristar, and Seascape. All three are far more productive than older “everbearing” types such as Ozark Beauty. They produce smallto medium-sized fruit, topping out at about 1 inch in diameter. But their flavor is excellent, particularly Tristar. Tristar produces a large amount of fruit early in the planting year, but the larger-fruited Tribute surpasses its production by the middle of September. Seascape, from California, has the largest fruit—nearly as big as June-bearing cultivars—and is the most productive of the three.
Early care.
Day-neutral strawberries prefer the same soil and sites as their June-bearing cousins. Plant them in the early spring, at the same time as June-bearing strawberries. They also are ideal for growing as annuals in containers. Day-neutral cultivars do not produce runners profusely, so matted- row management is not practical. Instead, plant them closer together— about 5 to 9 inches apart—in rows about 42 inches apart. Remove runners for the entire first season. This will increase yield significantly without excessive plant costs. Planting day-neutral strawberries in a staggered double row reduces competition between plants and increases yields Space plants 10 to 18 inches apart, alternating them in two narrow rows just 8 inches apart. Space these staggered double rows 42 inches apart on center. Day-neutral strawberries perform best when mulched with straw immediately after planting. Mulch reduces drought stress and keeps fruit clean. Remove flowers for several weeks after planting so plants can become established without premature fruiting. If the summer is hot and dry, little fruit will be produced in the fall because day-neutral strawberries are sensitive to extreme heat and have very shallow root systems.
Watering.
Because of these shallow root systems, keeping day-neutral strawberries well-watered is even more important than it is with June-bearers. Make sure they get at least an inch of water per week from rain and/or irrigation.
Fertilizing.
During their first year, apply 1 to 2 pounds of ammonium nitrate or 3 to 6 pounds of 10-10-10 per 100 feet of row at the beginning of each month from June through September. Thereafter, apply the same amount at the beginning of each month from May through September. Be very careful to sidedress the fertilizer and avoid contact with the leaves, especially when they are damp and the weather is hot. Instead of monthly applications, you can use annual applications of slow-release fertilizer that deliver the same amount of nitrogen. Flowering and fruiting. Day-neutral plants produce flowers from the time of planting through frost in autumn. Fruits form from open flowers in about 30 days. Because the flowering season is so long, flowers are more susceptible to insect attack than those of June-bearing strawberries. Many growers till under their day-neutral strawberries at the end of the first year and start over with a new batch of plants the following spring. If you decide to hold your plants over for another year, cover them with mulch, as you would June-bearing strawberries. The following spring, they will produce a crop in June, then another crop in August. They will not fruit as long into the fall as the first-year planting.
Weed control.
Because they are always fruiting and there is no good time for renovation, controlling weeds can be a challenge with day-neutral strawberries. These cultivars are also more sensitive to herbicides than June-bearing plants. Planting through black plastic mulch aids in weed control and warms the soil early. But this can hurt Tristar and Tribute cultivars in the summer because they are sensitive to heat. The best approach for home gardeners is to stay ahead of the weed problem. This can be done with light, frequent hand pulling, with light cultivation that avoids damaging shallow roots, and by mulching with straw.
Diseases and insects.
Tarnished plant bugs are a major insect pest of dayneutral strawberries. They can be an even greater problem than they are on June-bearing plants because their populations can soar during the summer months when day-neutral cultivars are struggling to cope with the heat. Gray mold also can be a severe problem with day-neutral cultivars, because the fungus accumulates during the growing season, especially if you do not harvest berries regularly.
Harvest.
For maximum sweetness and flavor, pick June-bearing and day-neutral berries a day or two after they are fully red. Berries picked before they are completely red will eventually turn red, but they will not sweeten. Slightly unripe fruit can be used for making jam. Under favorable conditions, expect a total yield of about 1 quart of fruit per foot of matted row. Immediately remove berries that do not ripen because they harbor diseases and attract insects. For long-term storage of fresh berries, select firm berries that are not yet fully ripe and cool them immediately after harvest. Store as close to 33 degrees F as possible, but be sure the berries do not freeze. Their quality should remain acceptable for several days. Freezing sliced strawberries with sugar and then eating them months later is a great way to recall spring during the cold winter.

Acknowledgments
The following specialists in the Department of Horticulture, Cornell University, contributed
to the development of this publication: Marcia Eames-Sheavly, Marvin Pritts,
Craig Cramer, Lori Bushway, Ian Merwin, and Richard Reisinger. Steven McKay, a
commercial fruit specialist with Cornell Cooperative Extension in the Hudson Valley,
also shared his expertise.

Cornell Gardening Resources
www.gardening.cornell.edu

Blackberries and Raspberries for your Home Garden

Blackberries and Raspberries (brambles) are a commonly planted small fruit in home gardens. They have vigorous growth, are seldom injured by spring frost and consistently produce high-quality fruit. The fruit is used for jams, jellies, pies and as a fresh fruit. Because of their vigorous growth, brambles should be planted in an area where they can be contained. They lend themselves as effective screens along property lines in landscapes. A reduction in the availability of wild berries make these fruits even more popular in home plantings. By choosing different types of brambles, you can harvest fresh fruit five to six months each year.

Types of Blackberries
Both thorned and thornless blackberries grow well in Tennessee. Each type has its advantages and disadvantages, though the sharp barbs on the thorned type are a negative factor when grown in the home landscape. Thorned blackberries do not require a trellis, mature their fruit two to three weeks earlier than the thornless varieties and usually have sweeter fruit at maturity. They are propagated by root suckers. Thornless blackberries are easier to prune and maintain. They produce trailing canes 8 to 12 feet long that are not strong enough to support themselves and require some type of trellis support. They are propagated by tip layering. Sometimes thornless fruit will sunburn because they mature in the hotter part of the summer. Types of Raspberries:
• summer-bearing, red-fruited
• black-fruited
• purple-fruited
• fall-bearing, red-fruited

Summer-bearing, red-fruited raspberries produce one large crop of fruit in the summer. They usually reproduce by root suckers and may produce a thick hedge after three or four years. Black-fruited raspberries are not as productive in Tennessee as some of the other types, because of their susceptibility to diseases. They usually do not produce root suckers and are propagated by tip layering. Their canes are not very erect and require trellising. Purple raspberries mature later in the summer than the red-fruited raspberries . They are vigorous but usually require trellising. They are propagated by tip layering.

Berries
Fall-bearing, red-fruited raspberries produce both a fall crop and early summer crop. The fall crop is the largest and produced on the upper portion of the cane, while the smaller summer crop is produced on the lower portion of the cane. Fallbearing raspberries are often managed for a fall crop only. With this method, all canes are cut at the ground and removed in late winter. The new canes that emerge during the spring will fruit that fall. This is the only type of bramble that will produce fruit the year the canes emerge. All other brambles (both types of blackberries and all other raspberries) produce vegetative canes one year, that fruit and die the next year. Therefore, canes which have fruited must selectively be removed with the vegetative canes left for next year’s crop.

Choosing The Best Varieties
There are many varieties of brambles to choose from when planting. Not all of these, however, are adapted to Tennessee’s climate. Home gardeners should consider the type of fruit they want and the management required to grow this fruit. The following varieties of blackberries and raspberries are recommended for Tennessee:

Blackberries:
Thorned Varieties
Cheyenne - Large, attractive fruit that ripens mid-June through early July. Canes are erect, vigorous and productive, but susceptible to the disease “rosette” (double blossom).
Shawnee - Fruits are large, attractive and have good flavor. Fruit ripens later and over a longer time than Cheyenne. Plants are productive, erect and vigorous, but also are susceptible to rosette.
Choctaw - Fruit size and flavor similar to Cheyenne and Shawnee but ripens one week earlier (early June). Plant vigor and growth are similar to Shawnee, as is its susceptibility to rosette.
Thornless Varieties
Chester - Fruit quality is good with large size, and the plants are vigorous and productive. Fruit is less sensitive to sunburn and bleeding. Plants have good winter hardiness and are resistant to cane blight.
Hull - Medium- to large-fruited variety with good flavor.
Fair winter hardiness.
Navaho - Only thornless variety with erect enough canes not to need trellising. Fruit quality reported to be better than other thornless varieties, but plants may not be as productive. Navaho has shown resistance to “double blossom,” a fungus disease common in Tennessee.

Raspberries:
Summer Red
Latham - Plants yield well, but have fair winter hardiness and are susceptible to mosaic virus. Fruit is medium-sized, round, firm and light red.
Titan - An early maturing, large-fruited variety with a high level of aphid resistance. May require trellising. Plants are susceptible to crown gall and root rot.
Black Cumberland - Also known as “Blackcap.” Canes are vigorous and productive. Fruit ripens in mid-summer.
Bristol - Heavier producer than Cumberland, with larger, high-quality fruit.
Jewel - Canes are vigorous and productive. More resistant to disease and larger fruit than Bristol.
Purple Brandywine - Vigorous plants with some disease resistance. Berries are large, tart and of good quality.
Royalty - Vigorous plants with multiple resistance to insects and the raspberry aphid which carries the mosaic virus. Larger, sweeter fruit than Brandywine.
Fall-bearing red
Heritage - Fruit is medium-sized, firm and high-quality. Produces fruit late summer to first fall frost.
Ruby - Larger fruit than Heritage and matures two weeks earlier. May be susceptible to root rot.
Autumn Bliss - Fruit matures earlier than Heritage and is of higher quality. Plants are less vigorous than Heritage with fewer root suckers produced.

Selecting and Preparing a Planting Site
If possible, plant blackberries and raspberries a minimum of 300 feet away from wild or existing plantings of brambles, to reduce the potential for disease problems. Avoid areas where tomatoes, potatoes or eggplants have recently been grown, to reduce the potential for verticillium wilt. Plant on a north-facing slope or hillside to reduce injury from spring frost. Almost any soil type, except those that are sandy, poorly drained or droughty, is suitable. The first step in preparing a site is to take a soil sample. Sample boxes and information sheets are available at your county Extension office. Work lime and fertilizer into the soil before planting, in accordance with soil test recommendations. Lay out the row area and kill any weeds or grasses within that area. This should be done in advance of planting so any weed regrowth can be killed.

Planting Correctly
Brambles can be planted any time they are dormant, usually from Nov. 1 to March 15. If a fall planting is made, a mulch at the base of the plant may reduce winter injury. Either root cuttings or root suckers can be planted. If root cuttings are used, plant them about 3 to 4 inches deep. If root suckers are used, make holes large enough and deep enough to completely spread the roots. Once planting is done, firm the soil around the plant and water well.

Author: Alvin D. Rutledge

Saturday, June 6, 2009

Growing Fruit Crops in Containers

People frequently want to grow some types offruit trees in containers, because of poor soil, improper climate or lack of sufficient space. Fortunately, a wide variety of fruit trees can be grown in containers with some degree of success. However, such plants will rarely be as attractive or grow and fruit as well as those grown under optimal conditions in the ground. One of the principal reasons for growing fruit plants in containers is portability. Thus, tropical and subtropical fruits can be grown in containers in areas where freezes might occur. The size and mobility of the containers allows the plants to be moved indoors during periods of damaging temperatures. This does not mean, however, that temperate zone fruits can be produced in subtropical areas, because these fruit trees require a certain amount of cold weather each winter in order to grow properly and produce fruit. Many fruits which can be successfully grown in containers are listed in Table 1. It is by no means complete, as most fruit trees could be grown in containers if the size of the container were not a problem. Most will produce some fruit if given proper care. Containers may be plastic, metal, clay, ceramic, wood or any others normally available at nurseries and garden supply stores. Used whiskey barrels cut in half are excellent or wooden boxes may be built to order. The container should have adequate holes at the bottom for drainage of excess water.

POTTING
The drainage holes of the container may be covered with pieces of screen mesh to prevent the soil from washing out. A (1-2 in) layer of gravel should be placed in the bottom of the container to facilitate drainage. Most commercial potting soils should be suitable for growing fruit trees. However, a mixture of 1 part sand, 1 part peat and 1 part bark, perlite or vermiculite will also serve quite well. The potting medium should be loose enough to permit adequate but not excessive drainage.
Examine the root system of the plant. If it is pot-bound or has experienced severe root crowding in its previous container, judiciously prune some of the larger roots and loosen others to facilitate root proliferation in the new container.
The container should be partially filled with soil (large containers should be filled at the site where they are expected to remain). Place the plant in the partially-filled container of soil to its correct planting depth which is the depth at which the plant was previously grown. The final soil surface should be 1-4 in. below the rim of the container, in direct proportion to container size, to allow for watering. Complete filling the container and firm the soil around the plant. Water thoroughly but do not fertilize until new growth commences. An attractive mulch of bark, gravel or other material can be added to improve the appearance of the container.

LIGHT
Most fruit crops grow best in full sunlight, but some will do well in partial shade. However, plants grow in direct proportion to the amount of light received, if other conditions are optimum, so container-grown fruit trees should be placed where
they will receive maximum sunlight. It is important that rapid changes in light
exposures be avoided, i. e., plants growing in partial shade should not be suddenly exposed to complete direct sunlight. Any plants that are to be grown indoors part of the year should be acclimated by gradually reducing the light to which they are exposed for 2-3 weeks before moving them inside and vice versa for plants being moved outdoors. Such acclimation is not necessary for plants that are to be moved indoors for a few days during freezes.

TEMPERATURE
Tropical and subtropical fruit trees cannot tolerate freezing temperatures for very long. Some will be killed back to the soil by mild freezes while only small twigs will be killed on others. Some root damage can occur because the root system is not as well insulated from cold in a container as it would be in the ground. Cold hardiness depends on the plant, the care it receives and many other factors. Protection from severe cold is essential for all tropical and subtropical fruits growing in containers. Plants may be covered temporarily with blankets, paper or other material as protection against hard freezes, but such materials should be removed each morning to allow the plants to take full advantage of incoming solar
radiation. Plants moved indoors during cold spells should be placed away from drafts caused by doors and heating ducts.

WATER
Most container-grown plants that do not thrive are usually in poor condition due to faulty watering practices, usually overwatering. Plants growing in containers should be watered only as needed. The frequency of watering depends upon such variables
as type and size of plant, type and size of container, temperature, humidity, potting medium and others. For most plants, the upper surface of the soil should be allowed to become dry to the touch before watering. Then water thoroughly by slowly filling the container. Good drainage of excess water from the containers is essential. The soil in plastic, metal and ceramic containers generally stays wet longer than it does in wood or clay container, which allow water to evaporate through the sides. Cool weather generally slows plant growth and thus reduces the plant's need for moisture, so watering should be less frequent during cool weather.

FERTILIZER
Good nutrition is essential for the success of container-grown fruit trees, but excess fertilizer can result in overgrowth, poor fruiting and possible dieback due to salt accumulation. Water-soluble fertilizers are widely available and should be used according to label directions. If mature foliage is a deep green color in most plants, adequate fertilizer is being used.
Many fertilizers can be used successfully, provided they are complete and balanced. The fertilizer should contain nitrogen, phosphorus and potassium in balanced proportions and should include lesser amounts or traces of magnesium, iron, manganese, zinc and copper. The ingredients and quantities of each nutrient contained are listed on the fertilizer label. Salt accumulation may sometimes be a problem and is often indicated by a white crust on the soil or container and may be due to excess fertilization and/or water containing considerable soluble salts. Should this occur, the container should be thoroughly leached by slowly running water through the container for several minutes. This will carry excess salts down through the soil and out the drainage holes.

PRUNING
With few exceptions, fruit trees will develop and maintain their natural shape with little or no training or pruning. They will occasionally become "leggy" when grown indoors or in poor light for too long. Leggy branches should be partially cut back to force branching and bushiness. Frequently, the top will grow rather large and begin to exceed the capability of the root system. Consequently, some leaf shed and twig dieback will often occur. Such plants should be pruned back heavily to rejuvenate them. When plants are heavily pruned, less fertilizer and water will be necessary to compensate for the reduced plant size.

FRUITFULNESS
Most fruit crops will produce fruit in containers, given time, good care, and adequate size and age. However, naturally large fruit trees will require larger
container to bear much fruit, as the amount of fruit produced is proportional to the plant's size, so large yields should not be expected. Many fruit plants need to be quite large in order to fruit at all, so their size can quickly become limiting in containers. Many fruit crops require the presence of pollinizer cultivars and pollinating insects, but such considerations are discussed in other documents dealing with specific fruits. It must be emphasized that even under the best of conditions, fruit production in containers will not equal the quantity produced on trees in the ground, as fruit trees grown in containers are usually growing under sub-optimal conditions.

Fruit crops which can be grown in containers:

Avocado
Calamondin
Blackbery
Banana
Key Lime
Blueberry
Barbados
Cherry
Kumquat
Fig
Capulin
Lemon
Strawberry
Carissa
Limequat
Carambola
Tahiti
Lime
Cocoplum
Cattley
Guava
Ceylon
Gooseberry
Coffee
Grumichama
Guava
Imbe
Jaboticaba
Kei Apple
Limeberry
Miracle Fruit
Monstera
Naranjilla
Papaya
Passion Fruit

Authors: Larry K. Jackson and Jeffrey G. Williamson